How to Add a Column to a Database with phpMyAdmin
Updated: November 27, 2023
phpMyAdmin is one of the most popular applications for MySQL database management.
phpMyAdmin is a free cPanel tool written in PHP, intended to handle the administration of MySQL over the Web. phpMyAdmin supports a wide range of operations on MySQL and MariaDB. Most common operations (managing databases, tables, columns, relations, indexes, users, permissions, etc) can be performed via the user interface, while you still have the ability to directly execute any SQL statement.
With phpMyAdmin, its possible to add a column to a Database Table.
This guide will show you step-by-step instructions on how to add a column to a Database Table.
Adding a Column
Step 1

Log into your cPanel Account.
Step 2

Navigate to Databases section and click on phpMyAdmin icon.
Step 3
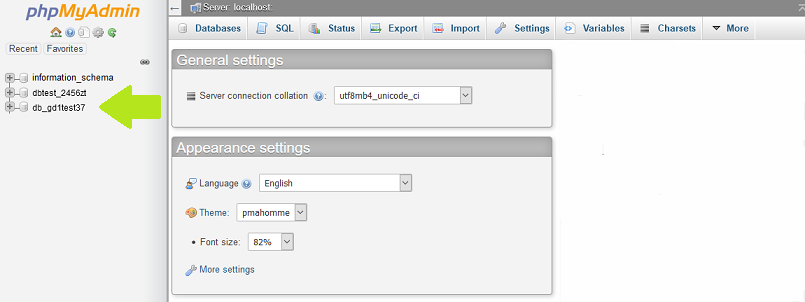
Select the database from the left panel that you would like to modify.
Step 4
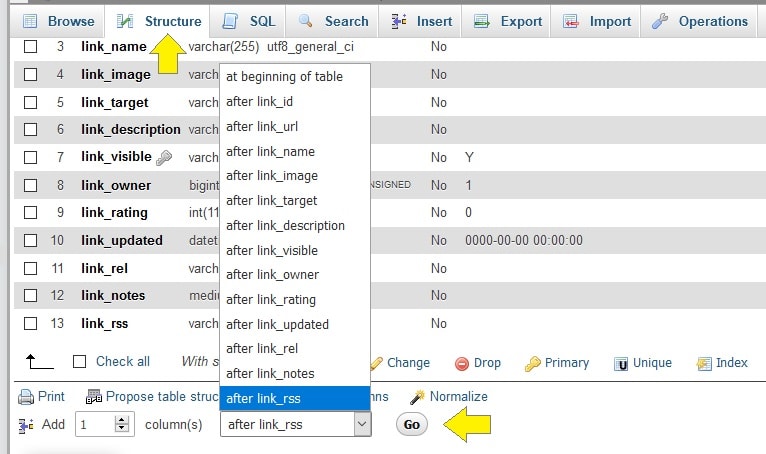
Select the Structure tab.
The Structure page displays the existing columns and provides more details on the configuration.
Below is a section to add one or more columns.
Enter the number of columns in the form field, and from the drop-down menu, select where to
create the new column. In our example, we are creating the column after link-rss.
Press Go when ready.
Step 5

Define the column simply by entering the following details:
Name The name of the column.
Type:The type of data, which will be stored in the corresponding column.
More details about the possible choices can be found in the official MySQL Data Types documentation.
Length/Values: The length of the field.
Default: With this option, you can specify if the fields in the column would have a default value.
This is useful when you want to have timestamps for the entries in each row.
Collation: The data collation for each of the fields.
Attributes: Assign any special attributes to the fields.
Null: Define whether the field value can be NULL.
More about the NULL value can be found in the MySQL documentation.
Index: Set the Index of the row.
More information about the MySQL column indexes can be found in the MySQL documentation.
A_I: Short for Auto Increment.
If this option is enabled then the values in the fields of the column will be auto incremented.
Click on the Save button when complete.
When successful, a message will appear stating your table had been modified successfully and
your new column will appear in the list of columns.
Now navigate back to the table, and you will see the new field has been added to the table.